Big thanks to mattjennings on GitHub, whose code I used to learn how to do this.
The blog that you’re reading right now is built with SvelteKit. Posts are written in markdown, and mdsvex is used to parse the markdown into HTML.
Through clever use of SvelteKit’s routing, we can automatically generate individual pages from markdown files.The blog that you’re reading right now is built with SvelteKit. Posts are written in markdown, and mdsvex is used to parse the markdown into HTML. Through clever use of SvelteKit’s routing, we can automatically generate individual pages from markdown files.
Parsing Markdown
In order to parse the markdown, we will use the library mdsvex, which is a Svelte preprocessor for markdown.
Installing and Configuring mdsvex
First, install mdsvex:
yarn add --dev mdsvexCreate mdsvex.config.js in the root of your project:
export default {
	extensions: ['.md', '.svx']
};
You might want to add some additional configuration options to mdsvex.config.js. For example, I’m using rehype-slug and rehype-autolink-headings, which makes it possible to automatically link each heading to its own URL. My config looks like this:
import slugPlugin from 'rehype-slug';
import autolinkHeadingsPlugin from 'rehype-autolink-headings';

export default {
	extensions: ['.md', '.svx'],
	rehypePlugins: [
		slugPlugin,
		[
			autolinkHeadingsPlugin,
			{
				behavior: 'wrap'
			}
		]
	]
};
After you’re done configuring mdsvex, head over to svelte.config.js and add the following to the config:
extensions: ['.svelte', ...mdsvexConfig.extensions],
preprocess: [
    mdsvex(mdsvexConfig),
    preprocess()
],
Our First Post
Now that we have mdsvex installed and configured, let’s write a sample post. Create a new file in the posts directory (which should be on the same level as src). Name it anything—I called mine first-post.md:
---
title: My First Post
description: This is my first post.
date: 2021-10-01
author: Ryan Salik
---

Sample paragraph.

# Sample Header
posts.ts
Before we can create a Svelte page, we must first write a script that will read all of our markdown files and generate a page metadata object for each one.
If you’re using Vite, you can use glob to import all of the markdown files at once:
export const posts = Object.entries(import.meta.glob('/posts/**/*.md', { eager: true }));Assuming that mdsvex is configured correctly, each entry in posts will be an array with two items: the first item is the path to the markdown file, and the second item is the markdown file itself. We can use a map function to extract the metadata we want from each markdown file:
.map(([path, post]: any[]) => {
		/* I'm using node-html-parser here, which enables me to find the first text
		 * element, which I use as the post's description. If you don't want to
		 * feature a excerpt of your post on the homepage, you can remove this. */
		const html = parse(post.default.render().html);

		let description;

		// If we have a description in the frontmatter, use that.
		// Otherwise, use the first text block of the post.
		if (post.metadata.description) description = post.metadata.description;
		else {
			for (const child of html.childNodes) {
				// TypeScript doesn't know that child is a HTMLElement,
				// and also doesn't know that HTMLElement has a rawTagName property.
				const ukChild = child as unknown;
				if (
					// Ignore headings
					!(ukChild as { rawTagName: string }).rawTagName?.includes('h') &&
					child.rawText.trim().length
				) {
					description = child.rawText;
					break;
				}
			}
		}

		// Feel free to add more parameters here to support extra features
		return {
			...post.metadata,
			slug: path.split('/').slice(-1)[0].replace(/.md$/, ''),
			description,
		};
	})
You can also sort the posts by date, and include an index property which will allow us to add a “next” and “previous” button to each post:
.sort((a, b) => new Date(b.date).getTime() - new Date(a.date).getTime())
.map((post, index) => {
	return { ...post, index };
});
Make sure that only the server can run this file by adding this to the top of the file:
if (browser) {
	throw new Error('This module cannot run in the browser.');
}
Creating the Blog Page
In src/routes/post/[slug], create a new Svelte page, a +page.ts file, and a +page.server.ts file.
+page.server.ts
In +page.server.ts, we will import the posts array that we created earlier. We will then use the slug parameter to find the correct post, and return the post’s metadata as props to the page:
import { posts } from '$lib/posts';
import { error } from '@sveltejs/kit';

import type { PageServerLoad } from './$types';

export const load: PageServerLoad = ({ params }) => {
	const { slug } = params;

	const post = posts.find((post) => post.slug === slug);

	if (!post) throw error(404, 'Not found');

	return { post };
};
+page.ts
In +page.ts we will import the actual markdown file.
import type { PageLoad } from './$types';

export const load: PageLoad = async ({ data }) => {
	const component = await import(`../../../../posts/${data.post.slug}.md`);

	return { post: data.post, component: component.default };
};
This script cannot be run in +page.server.ts, which is why we have to create a separate +page.ts file.
The Svelte File
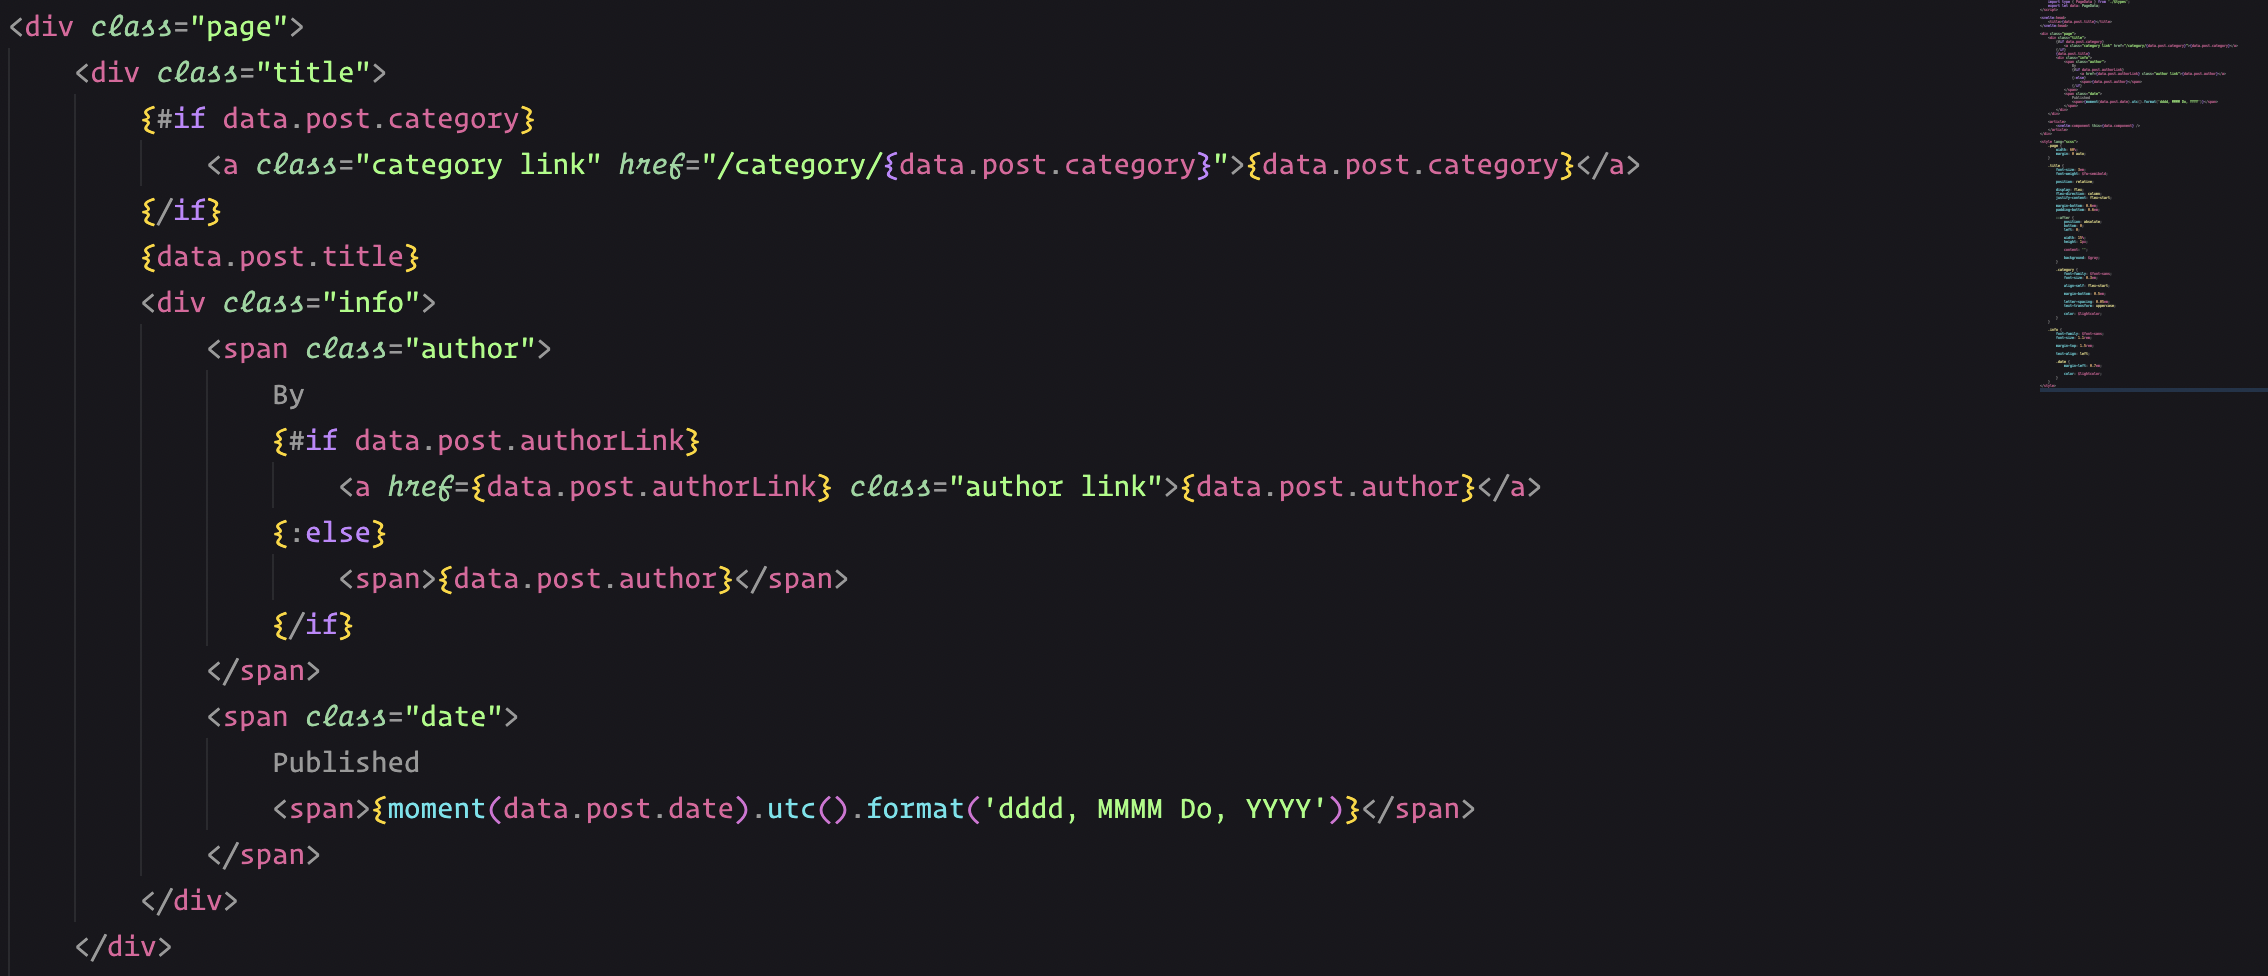
Finally, we can make the actual Svelte page. In src/routes/post/[slug]/+page.svelte, we will import the markdown file and render it:
<script lang="ts">
	import type { PageData } from './$types';
	export let data: PageData;
</script>

<svelte:head>
	<title>{data.post.title}</title>
</svelte:head>

<div class="page">
	<div class="title">
		<span class="author">
			<span>{data.post.author}</span>
		</span>
	</div>

	<article>
		<svelte:component this={data.component} />
	</article>
</div>
If you returned extra metadata in posts.ts, you can access it with data.post. In this blog, I also have a category property, a date property, an author link property, etc.
Wrapping Up
That’s it! You should now have a fully functional blog. If you want to see the code for my blog, you can check it out here.